A Comprehensive Guide to Roof Vent Maintenance, Repair, and Replacement
Whirlybird Roof Vents Installation packages Greater Sydney Area – Click Here
Rain Heads to the Trade Shipped Free Australia Wide – Click Here >
Dambuster Rain Heads Shipped Free Australia Wide – Click Here >
Gutter Sumps to the Trade Shipped Free Australia Wide – Click Here >
Eco-Friendly Roofing Insulation Shipped Free – Click Here >
Introduction
A well-maintained roof is essential for the protection and longevity of your home. Roof vents play a crucial role in ensuring proper ventilation and temperature control within your attic space. Neglecting roof vent maintenance can lead to a host of problems, from reduced energy efficiency to costly repairs. In this comprehensive guide, we will explore various aspects of roof vent maintenance, including checklists, tips, noise reduction, placement, pricing, repair, and replacement, with a particular focus on Sydney’s unique considerations.
Roof Vent Maintenance Checklist
Regular maintenance is key to extending the life and efficiency of your roof vents. Here’s a handy checklist to help you keep your roof vents in top condition:
1. Visual Inspection
- Check for Debris: Inspect your roof vents for debris like leaves, sticks, and bird nests. Clear any obstructions to ensure proper airflow.
- Examine the Flashing: Inspect the flashing around the vent for signs of damage or rust. Damaged flashing can lead to leaks.
- Look for Cracks or Damage: Inspect the vent itself for cracks or damage. Even small cracks can allow moisture to seep in.
2. Clean the Vent
- Remove Debris: Using a brush or your hands (while wearing gloves), remove any debris from the vent and the area surrounding it.
- Clean the Screen: If your roof vent has a screen, clean it to prevent clogs. A vacuum cleaner or a hose with a nozzle attachment can be useful.
3. Check for Proper Seal
- Inspect the Caulking: Check the caulk or sealant around the vent. If it’s cracked or deteriorating, reseal the area to prevent leaks.
4. Insulation Check
- Examine the Insulation: Inspect the insulation around the vent for any signs of damage, moisture, or mold. Replace if necessary.
5. Evaluate Attic Ventilation
- Ensure Adequate Ventilation: Verify that your attic has proper ventilation. Adequate airflow helps prevent moisture buildup, which can damage your roof structure.
Roof Vent Maintenance Tips
In addition to the checklist, consider these maintenance tips to keep your roof vents in optimal condition:
1. Regular Inspections
Perform visual inspections at least twice a year, ideally in the spring and fall. Additionally, check after severe weather events such as storms to catch any damage early.
2. Use Safety Precautions
When inspecting or cleaning your roof vents, prioritize safety. Use a sturdy ladder and appropriate safety gear, including gloves and non-slip shoes.
3. Trim Nearby Trees
If there are trees near your roof, regularly trim branches that could fall and damage the vents during storms or heavy winds.
4. Monitor Moisture Levels
Keep an eye on the moisture levels in your attic. High humidity can lead to mold and rot. Consider using a dehumidifier if needed.
5. Professional Inspection
Every few years, it’s a good idea to have a professional roofing contractor inspect your roof and vents for any hidden issues.
Roof Vent Noise Reduction
Roof vents can sometimes create noise due to wind or other factors. This noise can be disruptive, especially if you have living spaces near the attic. Here are some strategies for reducing roof vent noise:
1. Install Vent Covers
Roof vent covers or caps are designed to reduce noise by diverting the airflow. They can also prevent rain and debris from entering the vent. Ensure you choose vent covers designed for noise reduction.
2. Add Soundproofing
Consider adding soundproofing materials inside your attic. These materials can help dampen the noise from the roof vents. Options include acoustic foam panels and fiberglass insulation.
3. Inspect for Loose Components
Sometimes, noise can result from loose or damaged components within the vent itself. Have a professional inspect and repair any loose parts.
Roof Vent Options
When it comes to roof vents, there are various options available. The choice depends on your specific needs and the type of roof you have. Here are some common roof vent options:
1. Ridge Vents
Ridge vents are installed along the peak of the roof, allowing for continuous ventilation. They are efficient and blend well with the roofline, providing a discreet appearance.
2. Gable Vents
Gable vents are installed in the gable end of the attic. They are effective for cross-ventilation when paired with soffit vents, drawing air in through the soffits and expelling it through the gables.
3. Roof Louvers
Roof louvers are low-profile vents that can be installed near the roof’s peak. They are often used for attic ventilation and are available in various styles.
4. Turbine Vents
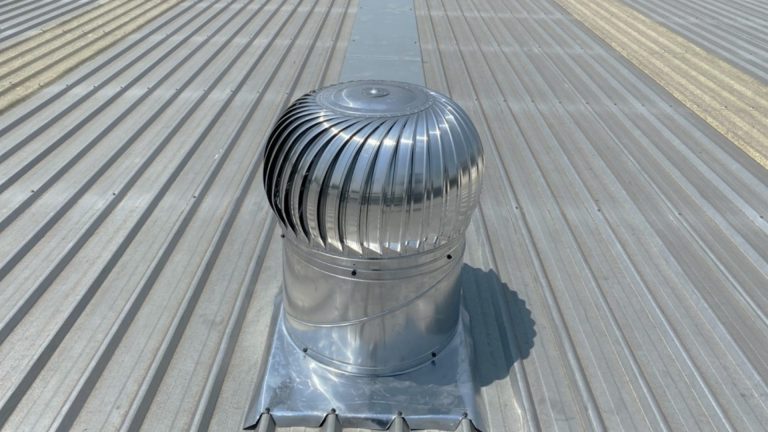
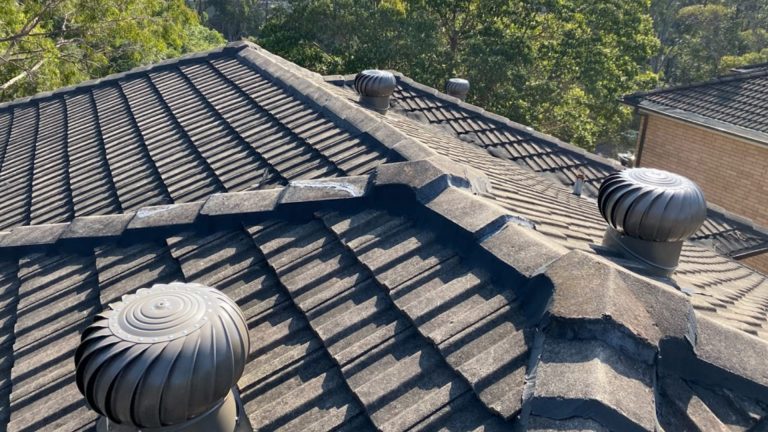
Turbine vents are wind-driven vents that use natural wind currents to create airflow. They are energy-efficient and can be particularly effective in windy areas.
5. Solar-Powered Vents
Solar-powered vents are equipped with solar panels that power a fan, increasing ventilation efficiency. They are ideal for reducing energy costs while maintaining proper attic ventilation.
Roof Vent Placement
Proper roof vent placement is essential for effective ventilation and temperature control. The placement of vents can vary based on the type of roof and the design of your home. Here are some general guidelines for roof vent placement:
1. Ridge Vents
Install ridge vents along the peak of the roof for optimal ventilation. They work best when paired with soffit vents to create a continuous airflow path.
2. Gable Vents
Place gable vents on the gable ends of the attic. Ensure they are evenly distributed for balanced ventilation.
3. Roof Louvers
Roof louvers can be strategically placed near the roof’s peak to allow hot air to escape. Consider the size and number of louvers based on your attic’s size and needs.
4. Soffit Vents
Soffit vents should be installed along the underside of the eaves. They provide intake ventilation, drawing cooler air into the attic.
5. Turbine Vents
Turbine vents are typically placed near the roof’s peak and can be evenly distributed for effective airflow.
6. Solar-Powered Vents
Solar-powered vents should be placed where they receive maximum sunlight exposure to ensure efficient operation.
Roof Vent Placement in Sydney
Sydney’s climate and architectural considerations make proper roof vent placement crucial. The city experiences a temperate climate with hot summers and mild winters, making attic ventilation essential for temperature control and moisture prevention. When placing roof vents in Sydney, consider the following:
1. Hot and Humid Summers
Sydney’s hot and humid summers can lead to heat buildup in your attic. Ridge vents and solar-powered vents are effective choices for expelling hot air during these periods.
2. Moisture Control
Sydney’s coastal location means increased humidity levels. Proper attic ventilation, including the use of soffit vents, helps prevent moisture buildup and mold growth.
3. Bushfire Safety
Bushfires are a concern in Sydney’s surrounding areas. When placing roof vents, consider fire-resistant options and maintain clear areas around your home to reduce fire risk.
4. Professional Advice
Consult with a local roofing expert in Sydney to determine the best vent placement based on your specific location and home design. They can provide valuable insights tailored to your needs.
Roof Vent Pricing
The cost of roof vents can vary depending on factors such as type, material, installation complexity, and location. Here’s a rough pricing guide:
1. Ridge Vents
Ridge vents typically cost between $2 to $3 per linear foot, excluding installation. Installation costs may vary based on your location and roof complexity.
2. Gable Vents
Gable vents are more affordable, with prices ranging from $50 to $150 each. Installation costs will depend on your home’s design.
3. Roof Louvers
Roof louvers can cost between $40 to $150 each, not including installation. Complex installations may incur additional charges.
4. Turbine Vents
Turbine vents are priced at approximately $50 to $100 each, excluding installation. Installation costs vary based on roof type and accessibility.
5. Solar-Powered Vents
Solar-powered vents are on the higher end of the pricing spectrum, ranging from $300 to $500 each. However, they can significantly reduce energy costs over time.
Remember that these are rough estimates, and actual costs can vary. It’s advisable to obtain quotes from local roofing professionals to get accurate pricing for your specific needs.
Roof Vent Repair
Over time, roof vents may require repair due to wear and tear, weather damage, or other issues. Here are steps to follow when repairing a roof vent:
1. Inspection
Perform a thorough inspection to identify the cause of the problem. Look for cracks, leaks, loose components, or damage to the vent or surrounding materials.
2. Gather Materials
Gather the necessary materials, including sealant or caulk, replacement parts (if needed), a ladder, safety gear, and tools.
3. Clean the Area
Remove debris and clean the area around the vent to ensure proper adhesion of sealant or caulk.
4. Seal or Repair
If you find cracks or gaps, seal them with an appropriate roof sealant or caulk. Replace damaged components if necessary.
5. Test for Leaks
After repair, check for any remaining leaks by conducting a water test. Pour water around the repaired area and inspect the attic for signs of leakage.
6. Regular Maintenance
Continue with regular maintenance to prevent future issues and extend the life of your roof vent.
Roof Vent Repair in Sydney
Sydney’s climate, with its occasional heavy rainfall and strong winds, can take a toll on roof vents. When repairing roof vents in Sydney, consider the following:
1. Choose High-Quality Materials
Use high-quality sealants and materials designed to withstand Sydney’s climate conditions, including temperature fluctuations and moisture.
2. Timely Repairs
Given Sydney’s weather patterns, it’s essential to address roof vent issues promptly to prevent further damage and potential leaks during heavy rains.
3. Professional Assistance
For complex repairs or extensive damage, it’s advisable to seek the assistance of a professional roofing contractor with experience in Sydney’s climate.
Roof Vent Replacement
In some cases, roof vents may reach the end of their lifespan or become severely damaged, necessitating replacement. Here’s a guide to roof vent replacement:
1. Assessment
Determine if replacement is necessary by assessing the extent of damage or wear. Consider the age of the vent and its overall condition.
2. Choose a New Vent
Select a replacement vent that matches your attic’s needs and the roof’s design. Ensure it meets or exceeds local building codes.
3. Gather Materials
Collect the necessary materials, including the new vent, sealant or caulk, safety gear, tools, and a ladder.
4. Remove the Old Vent
Carefully remove the old vent, taking care not to damage the surrounding roof materials.
5. Install the New Vent
Follow the manufacturer’s instructions to install the new vent securely. Ensure proper sealing to prevent leaks.
6. Test for Leaks
After installation, conduct a water test to check for any leaks. Inspect the attic for signs of moisture.
7. Dispose of the Old Vent
Dispose of the old vent responsibly, following local disposal guidelines.
Roof Vent Replacement in Sydney
When replacing roof vents in Sydney, consider the unique climatic factors:
1. Compatibility with Climate
Choose replacement vents that are suitable for Sydney’s climate, including those designed to handle moisture and temperature variations.
2. Fire Safety
If you live in bushfire-prone areas surrounding Sydney, opt for fire-resistant roof vents to enhance safety.
3. Professional Installation
Ensure proper installation by hiring experienced roofing professionals who understand the challenges posed by Sydney’s weather.
Conclusion
Maintaining, repairing, or replacing roof vents is essential for the overall health of your home’s roof and attic. Regular inspections and maintenance can prevent costly damage and improve energy efficiency. Whether you live in Sydney or elsewhere, understanding your climate and specific roofing needs is crucial when selecting and maintaining roof vents. By following the guidelines outlined in this comprehensive guide, you can ensure that your roof vents provide efficient ventilation and protection for years to come.


